| |
|
|
|
 |
|
|
|
|
|
 |
After
keeping fishrooms for 30 years, I tried a wide variety of
aquarium stands - generally the metal
put-together stands from Home Improvement Stores that
run about $80 and rust out in about 7-10 years.
I am getting to where I would like my fishroom stands
to be more permanent than that, and needed
stands that were:
- Heavy wood that would be stable and that could be painted
to waterproof them.
- That you could make at home with a cheap saw, electric
drill and tape measure, ideally
in just a couple hours, without need for a
shop to do cut-outs, etc.
- That would be incredibly strong and stable, able to hold 2
rows of 55 gallon tanks easily.
- And that were made of only 2x4s, 3/4' plywood for the
shelves under the tanks, some 4" x 1/2" panels,
some screws and maybe a bolt or two. Cost must be
minimal.
I did find that stand, and here is how you make it.
If you have any questions about anything here that
does not seem clear, please email selectaquatics@gmail.com,
and I will get right back to you!
Lastly since this
involves power tools and a period of sobriety I am aware may be
challenging for some
fishkeepers I know, you will need to set aside a
weekend to do this properly. I have made 10 of these
racks so far, and found that spending the first day
cutting the wood, then painting it, then putting
the rack together the next day worked best. These racks
have worked well for me. Study the
design carefully, and understand how and why these
racks work before cutting any wood.
However, if you
injure yourself, or you have trouble with the rack for any
reason, Select Aquatics
can in no way be held responsible! Good luck!
Greg Sage, Owner, Select Aquatics
|
|
|
|
|
|
| |
|
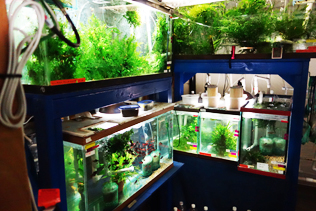
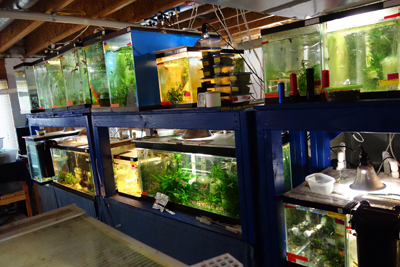
This pair of
racks were built fall 2014, and these are
very sturdy and stable. However, that extra strength
comes with a price- each rack is slightly longer due
to the double legs, than a standard rack with single
supports. But a standard rack requires cut outs needing
wood shop tools. This rack can be done by one person
in their fishroom, and this rack will never sway or tilt.
|
|
|
|
|
|
 |
|
|
Tools and materials You
Will Need:
- A circular hand saw that
can make straight cuts
- A drill that can handle drill bits and three inch wood
screws
-If possible, a second drill to drill pilot holes, then just switch
drills to put screws in
(This is a big time saver as each rack takes around 60
screws)
- A tape measure and pencil
- I use duct tape to hold joints together before pilot holes
are drilled, and screws
are put in.
- 2x4s, enough to build the size stand you are looking for.
(See below)
- 42 inches of a 4" x 1/2" wood slat also available at any lumber
store
- Two 4'x2' pieces of 3/4" plywood for the shelf bottoms
- A box of 3" wood screws
- 20-25 1.25" wood screws to attach plywood shelving to rack,
and braces to back.
- Paint and paintbrush
- A drill bit to make pilot holes for the 3 inch
screws, and screwhead bit*
- Paint and paintbrush
* I found that using a "star" type head, rather than a Phillips,
was quicker and easier |
|
|
|
|
Step 1:
Draw Up What you will Need
Each Rack
will have 22 pieces of wood, regardless of the rack size. How
big you want
the rack to be will come down to the lengths of these pieces.
There will be:
4 Legs
4 Rails (The long horizontal pieces)
4 Front to Back horizontal Supports (or 8, if you want to
double up - see below)
8 Vertical leg Supports - 4 for each shelf- 4 cut for bottom
shelf, 4 for top
2 4 x 1/2" diagonal back supports
For Example, the natural colored wood stand below has 2
shelves, the tank footprint
is 13x48 inches. The first shelf is 31 inches off the ground,
the top shelf is 63 inches.
The dimensions for that stand are:
4 Legs - 62 inches each
4 Rails - 52 inches each
4 Front to back Supports - 10 inches each
4 Vertical leg supports for bottom shelf - 30 inches each
4 Vertical leg supports for top shelf - 28.5 inches each
Two 21 inch 4 x 1/2" diagonal back supports
Keep in mind to purchase 2x4s that are 8 feet long, and then
plan how to cut
them so that you make most efficient use of the wood.
To increase the depth of the rack, simply increase the length
of the Front and Back Supports.
A rack can
be as long as 8 feet, but if you go over 4 feet, you will need
to
provide for a middle set of legs to break up longer than a 4
foot span,
Or the rack may not be able to hold the weight of the aquariums. |
|
|
|
|
|
|
|
|
| |
|
|
|
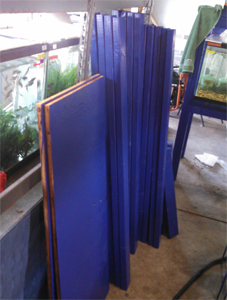
Raw Materials
Because it
is best to paint the wood before it is
built into a project, I would build a stand over 2 days.
Day 1 the wood was measured and cut, sorted and then
painted to dry overnight. Day 2 involved putting the
rack together, and removing tanks from any racks the
new ones were replacing, then, getting the new rack
set up with tanks, etc. |
|
|
|
|
|
|
| |
 |
|
|
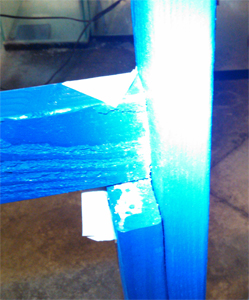
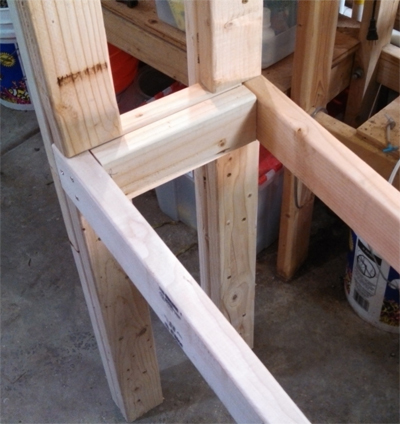
Attaching Lower
Supports
Attach pieces cut
to height of first shelf
to the bottom of each leg as shown. The Rails
will be set and attached as shown, with
two 3 inch screws coming in from the
other side. To put the bottom rail on the legs
so it is supported, before screws have
been put in, I will duct tape the joint
as shown on one end, then attach
and screw the other side in as shown in
the pic to the left.
|
|
|
|
|
|
|
| |
 |
|
|
|
|
|
 |
|
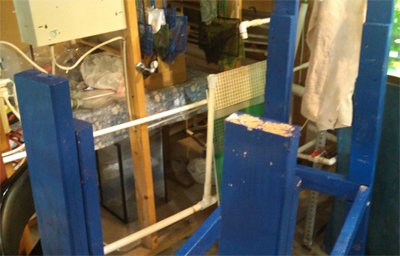
So now you will have the two
sides of the rack
constructed, with the rails for the first shelf
attached, but the two structures are not
connected to one another. Be sure when you
attach the rail ends to the legs you will need
a left and a right half, so place the rails on
the legs correctly. |
|
|
|
|
|
|
 |
|
The Front to back pieces are
now put in, and
they are screwed in as shown, as well as 2 screws
going in from the back side. Be careful putting in
screws at these areas - it is easy to have them hit
one another. |
|
|
|
|
|
|
 |
|
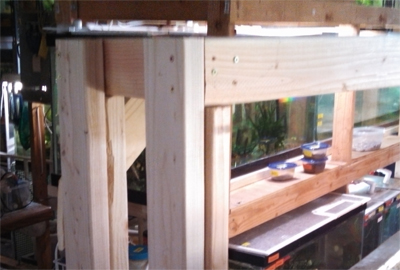
This is a better pic of another stand with
similar construction. In this case I put in two
front to back pieces at every joint thinking it
would provide extra stability. It may have,
all of the stands I have made since have had
just one. Then, as you can see, the upper
supports are attached next. I used 4 screws
for each support. |
|
|
|
|
|
|
 |
|
At this
point, with the upper supports attached,
you should have a structure that looks like this. |
|
|
|
|
|
|
 |
|
The top Rails and Front and Back pieces are
attached in the same manner as the lower
shelf was.
The
secret to this design is that the wood distributes
the weight by resting against other 2x4s, which are
held in
place by a second set of 2x4s that provide stability.
The screws do very little weight bearing. |
|
|
|
|
|
|
 |
|
This
shot shows how at least two screws are going
in to hold each of the Front to Back cross pieces.
As well, you can see how without paying attention,
These 3 inch nails can easily hit one another inside
the wood.
|
|
|
|
|
|
|
 |
|
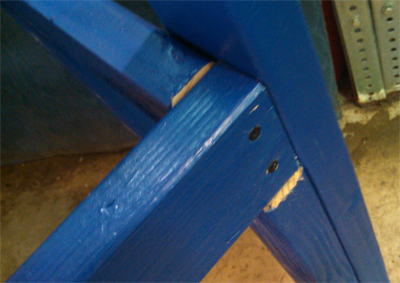
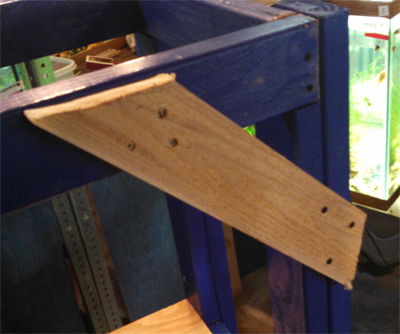
Once the rack structure is
all put together,
at both top corners on the backside of the rack,
attach a piece of 4" x 1/2" panel wood, each
piece about 18- 21" long., with the ends cut to
fit as shown. These braces are essential. |
|
|
|
|
|
|
 |
|
Here is a stand just
completed, and the 3/4" plywood has
been attached with the 1.25 inch wood screws. On this rack,
the plywood was cut to extend out and a provide a small
work area. This rack is the one on the left in the top pic.
The piece of 3/4" plywood still needs to be attached to to
the top. |
|
|
|
|
|
|
 |
|
And this is
the final result! |
|
|
|
|
|
|
|
|
|
|
|
|
|
|
|
|
|
|
|
|
|
|
|
|